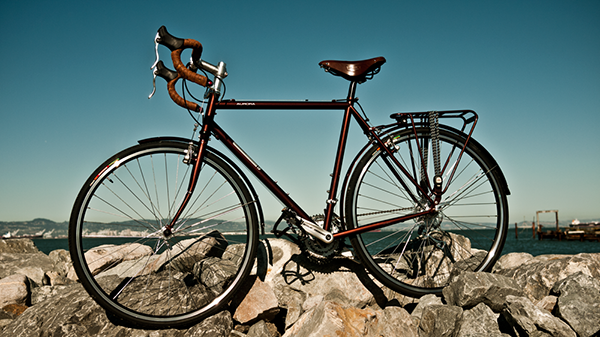
San Francisco Bike Camping is Easy

August 29, 2012 at 6:28 pm

If there were 6,000 reasons I felt lucky to be a San Francsican, here’s reason #6,001: Bike camping in San Francisco is wildly easy.

I want to take a few small tours to test out my load and my gear before I ship off to France. In fact, this probably could have happened sooner. A mini-adventure is always a great reality check. The best advice I can offer to hikers, cyclists, climbers, and adventure-seekers of any sort who are shopping and researching is to just go. Plan a short trip with what you have on hand and just get out there. Everyone is adamant about their advice and everyone’s advice is different. You won’t know what is important to you until you’re setting up camp.

With that in mind, I set off for the Marin Headlands from San Francisco on what my buddy E. referred to as a “simulation.” I packed more like I will for the actual bike tour than how I would have packed for a night in the Headlands, because I wanted to feel the actual weight of my bike. I reserved a bike camping spot at Bicentennial Camp. This required that I stop by the visitor center for a permit. The visitor’s center closes at 4:30. But my buddy and I had to finish discussing Breaking Bad and eat some falafel. We got out of the city late and in no time to actually visit the visitor’s center. Not having a permit was absolutely no issue.


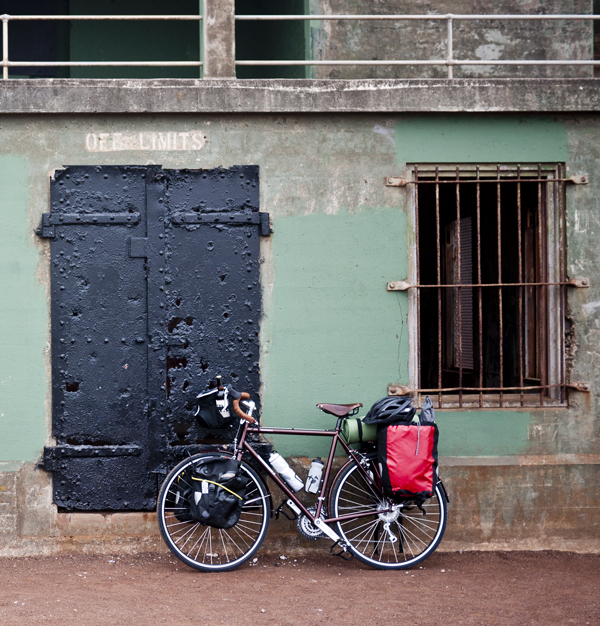
Jamis Aurora at the Marin Headlands Battery

Fully loaded success.


I felt a little extra prepared with my new handlebar bag. Before I left, I stopped into Sports Basement in San Francisco. They claimed to be out of handlebar bags. Then, walking out disappointed, I noticed a really nice bag on a display bike in the middle of the sales floor. A helpful staff member was nice enough to remove it from the bike and sell it to me. Score. It’s a great little bag for your camera, map, and a little food.

Getting to Bicentennial Camp from San Francisco is easy. Take the Golden Gate Bridge, find the one-way tunnel and basically proceed straight. When there’s a sign for the Visitor’s Center, it will be helpfully pointed away from you. Luckily, you can learn a lot by looking at the backs of signs.

We found our camp site after a few photo-touring adventures of batteries, cliffsides, and a light house. I set up my tent in a spot that would have been a lot nicer to set up a hammock. This was my final indication that it would be smarter to tour with a hammock. This is one of those debates where everyone’s opinion is different and equally strong. I really like camping with hammocks. I spent some time on the Appalachian Trail and carried only a hammock. I think they’re light, easy to set up, and I sleep well in them. If you like spending time in your tent or can’t sleep well in a hammock, they’re a bad idea. For me, they’re just a great way to save weight.

E. and I found a small beach that was dark and rocky. We spent some time staring into the thick gray fog of the bay and then built a really impressive cairn. If you don’t believe me that it was impressive, you’re welcome to go find it.

Find out more about bike camping in San Francisco here! 

(Attempting) to Secure a Brooks Saddle

August 21, 2012 at 2:22 am

Brooks saddles are like mid-90s Honda Accords–a huge target for thieves. And since I’ve already had a mid-90s Honda Accord stolen (I named it D’Accord, but didn’t have the vanity plate made in time), I intend to keep my Brooks Saddle.

Everyone has a different idea of how to best secure a saddle. It’s a little difficult to trust what anyone says about saddle safety because of a really significant sampling problem. If you have had your seat stolen, you think the way you secured it was dumb and bad. If you haven’t, you tend to think you’ve done a pretty good job of locking it up.

Here are the most common methods of securing a bike seat:

1. “Hey, that’s a funny lookin’ bolt.” The locking skewer. These fall into different categories. Some are simply bolts with unique imprints so that special tools are needed to remove them. Others claim to be more sophisticated and require that the bike be flipped over to remove them. Unfortunately, the cycling world is full of stories about how thieves have bypassed these. Vice grips and magnets seem to work just fine.

2. “You wouldn’t want it anyway.” The least sophisticated strategy on this list–just toss a plastic liquor store bag over your seat. This way thieves will have to remove a liquor store bag from your seat before stealing it. Well, they wouldn’t really have to remove the liquor store bag before stealing it. In fact, they would mostly just have a handy place to hide your seat as they leave the scene of the crime. Well, maybe they ‘ll think you have such a terrible seat that you’re ashamed of it and it’s probably not worth stealing. I don’t really understand the theory behind this, to be honest.

3. “What bike seat?” Without a doubt the most effective method of keeping your bike seat from being stolen is to take the seat off your bike. That’s right, don’t leave it outside. Just carry it with you. Hard to argue with this advice, really. The only thing ridiculous about it is that there are probably other parts of your bike equally expensive and equally easy to remove. But considering seats are the biggest target, your risk will be significantly lessened.

4. “If I can’t have you, no one will.” This is the strategy that causes the most nuisance for the actual bike owner. Take a ball bearing and superglue it into the hex imprint on the bolt. It neutralizes the effectiveness of most tools. I recommend you dial in your bike’s setup REALLY well before taking this approach. Dissolving the superglue will take a good 20 minutes with a Q-Tip as you listen to This American Life and your arm gets tired.

5. “Chains aren’t just for sprockets anymore.” I see this often in San Francisco. Riders take an old bike chain and loop it from your frame through the rails of your saddle. Chains are a pain in the ass to cut through. But if you have a chain tool handy, removing a link takes a few short moments. If you use an older rusty chain, this significantly increases the time it would take to remove a link.

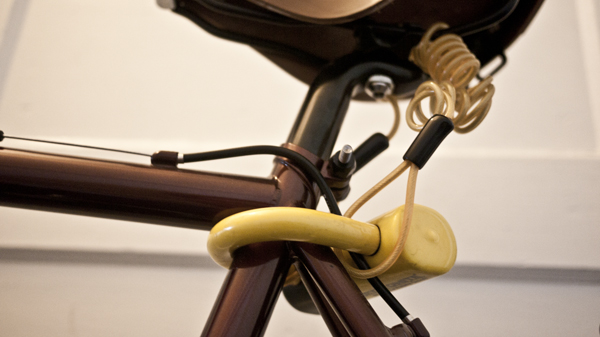
6. “What I did.” I wouldn’t ever tell you that this is the best, or even a very good strategy. But considering I want to continue adjusting my bike for a little while before heading off on my bike tour, I needed something more adjustable than a ball-bearing and superglue. Luckily, I had a U-Lock for a motorcycle’s disc brakes sitting around in my apartment. Since I don’t have a motorcycle anymore, nothing’s safety was being compromised by the re-purposing effort. The lock is small enough to fit through the frame without becoming a nuisance while riding. And I’m able to take the cable and feed it through the saddle rails. How secure is this? Not very. I could see it being a secure solution with a thicker cable, but it’s heavy and kind of dumb when compared with the other options on this list.


Motorcycle disc brake lock for saddle security.

Mostly stupid, somewhat secure.


An old hiking expression comes to mind when talking about security from bicycle theft: You don’t need to be faster than the bear, just so long as you can outrun your fellow campers. If someone is looking to make a quick theft, you’re normally going to be fine as long as your things are better secured than your neighbor’s. Unless of course the thief plans to steal lots of things at once. Or the bear is really hungry.


Planning For A Bike Tour

August 14, 2012 at 2:31 am

Everyone approaches planning differently.

Me, I generally like to do sporadic research about random aspects of something. Then, I stress out about the stuff I didn’t research and agonize about the fact that I should be researching other things I don’t know about. Then, when the actual event I’m planning for, when that arrives, I think quickly on my feet and things work out pretty good. In terms of planning strategies, this isn’t one you’ll discover in any books. That’s because it’s a bad strategy.

Some people think I remain calm and go with the flow.  They’re generally undervaluing just how much I overthink things while staring at the ceiling, apparently seeming very calm.

Luckily, it seems that I’ve found like-minded souls in those people who take up bicycle touring. From most accounts that I’ve read, more than a rough outline of a trip is unnecessary. This is mostly due to the fact that once the rubber hits the road, things change. You meet people, or get sick, or find someplace else you’d like to go. My two-part planning strategy of first agonizing and then adjusting seems perfectly suited to this arrangement.

I leave for France on September 10th, just under a month from now. As of now, the route that I’ve decided on for my French tour could fit on a bar napkin. It’s basically a U. I will start in Paris and head to Normandy. From there, I want to travel south, and then follow the coast of the country. This is based on a couple of pieces of advice. One friend of mine, a native Parisian, mentioned that the middle of France is nothing compared to the coasts. In my ridiculously biased opinion, this is largely true of the United States as well. The good stuff is all stacked on the sides. I didn’t know how logical this route would be, but then I saw that these guys had done it. Sometimes just reaffirming that something isn’t insane is enough to move forward.

I plan to avoid French cities. With enough money and time, I would love to spend time in each city along the route. I love cities. If I ever live in France, it will likely be in a city. But I just don’t have the money to do them justice. Instead, I might roll through but I’ll likely avoid them. There are enough other things to see along the way.


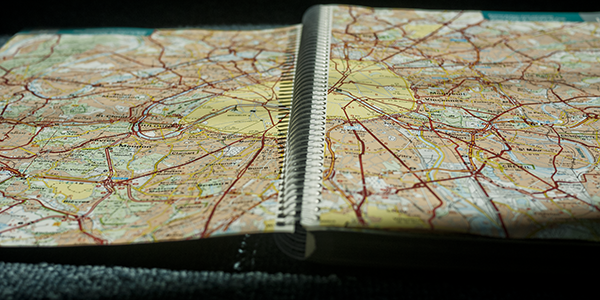
A shot of the 1:200,000 Michelin French Road Atlas 'In action'

Again, totally no idea what I’m doing.


One thing that my open-ended planning strategy makes difficult is carrying a map. I bought a 1:200,000 French road atlas from Michelin. It has scenic routes and back roads and the stamp of approval of other bicycle tourists. It also weighs about 80 pounds. I could tear out only the pages that correspond to my route, but I don’t know my route. I could also buy individual maps that correspond to my route, but I don’t know my route. A third option would be to photocopy only the pages that I need along my route. But, well, you get the idea.

I’ll likely tear out the pages that correspond to areas that I’ll least likely explore. More on that problem when I solve it.

The 2012 Jamis Aurora – For Bike Touring in France

August 7, 2012 at 2:37 am

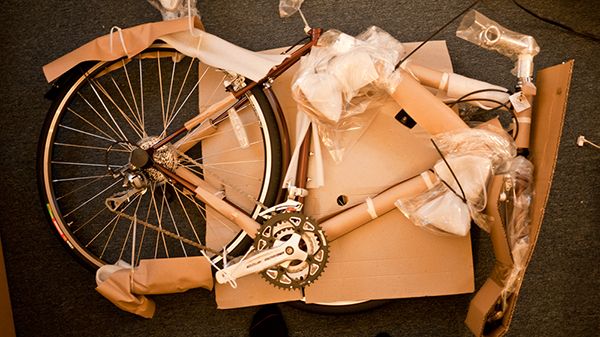
A couple of months ago, I wouldn’t know a good touring bike if it ran me over in the street. After looking around a bit, and a totally fruitless Craigslist search, I wound up with a 2012 Jamis Aurora. A friend of mine was able to give me a deal on the bike if I bought it unbuilt, in a box. This is what I opted to do for three reasons:

  • It was cheaper.
  • Building the bike would teach me how to maintain the bike on the road (in theory).
  • I would have the box to repack the bike and put it on a plane.
The 2012 Jamis Aurora -- Almost

I have no idea what I’m doing.


Assembling the bike wasn’t terribly frustrating, except for the seat post–which I’ll get to in a bit. I went about learning each step of the building process just like any well-educated person does in 2012. I YouTube’d everything.1

I hadn’t set up derailleurs before, so that took the most time. To a single speed rider like myself, a touring bike looks like The Homer. But I was able to get past my cable-and-doohickey aversion and learn a whole lot in the process.

The 2012 Jamis Aurora comes with mostly decent components, with a few glaring exceptions. The pedals are absolute garbage. They’re plastic with plastic toe cages and nylon straps. Only the most casual of casual riders would be caught dead using these things. And then there’s the saddle assembly. The saddle is powerfully ugly. Why they couldn’t ship the bike with a basic black saddle is beyond me.

The Aurora ships with a seat post that is known to be faulty. I found several forum posts with disgruntled customers griping about how at maximum tightness, their seat still slid around freely. I adjusted my seatpost height, tightened the bolt as well as I could and the seat post still slid from side to side. Frustrated, I stripped the bolt trying to get it tighter and then ultimately trying to get it off.

Luckily, I have a Dremel tool. I cut off the bolt at the center, where there is a break in the frame to clinch the post. The built-up tension caused the bolt to soar across the room once it was finally split in half. It was doubly satisfying to cut the damned thing off. After that, I walked over to my LBS planning only to buy a seat post that actually fit. Instead, I walked out with a new saddle as well. I’ve never had the pleasure of owning a Brooks saddle, and this seemed like a fitting time to try one out.


The 2012 Jamis Aurora in San Francisco.

With a new saddle, it’s a nice looking bike.


Once I had the bike totally set up, I took it for a spin. At 5’9″, the 55cm frame is about as big as I would ever want it to be. It’s certainly at my upper-limit as far as comfort goes. But I’m satisfied, and ready to see what this thing can do.


1
I have a friend who went hunting every day for a whole season without finding a deer to shoot. This is a true story. He was driving home one day and found a dead deer on the side of the road. It was freshly killed, steam rising in the morning air. At any rate, he decides that this is his deer, regardless of how it wound up becoming an ex-deer. He tried at first to lift it away from his body so that he wouldn’t be covered in deer bits, but it was far too heavy for that strategy. Instead, he had to bear hug the thing in order to drop it into the trunk of his tiny Hyundai. I don’t remember if the trunk closed all the way, but either way it’s a pretty unique visual image. At any rate, he gets the carcass home and drags it into the back yard on a big blue tarpaulin. And then he walks inside and looks up a YouTube video on how to field dress a deer. Once outside, he performs the process. After that, he went back to the computer to learn how to harvest the meat. And then he repeated the process again to skin it. Mind you, I wouldn’t had believed this story if it had come from someone unreliable. YouTube is amazing.